Some personal projects

I found out this past week that I did not get into the craft fair I had applied for. It may be a blessing in disguise. A new project has cropped up unexpectedly - a memory quilt for my aunt and her step-kids (who aren't kids anymore, of course). Possibly even two quilts. 

only a portion of the shirts my aunt sent me...

only a portion of the shirts my aunt sent me...

My uncle passed away unexpectedly after complications from a surgery. My aunt seems to be keeping it together much better than I could imagine, but thankfully has a great support system too. She asked me if I'd be up for making a memory quilt from his ties and shirts that she can give his kids for Chanukkah. Of course I said, "yes" though that was before I learned of the proposed deadline ;-) So I reiterate, it may be a good thing that I don't have the craft fair to worry about finishing all of that holiday inventory I have been spending my time on. 

After looking through the box of clothing she sent, I wasn't sure what approach I would take for this. Then I was browsing Pinterest over my morning coffee just today and saw a picture that I had seen months ago on Debbie's blog, A Quilter's Table.  The first photo, the Hugs and Kisses block, on her 2nd quarter Finish-A-Long post inspired me even before having this project.

Low-Volume Hugs & Kisses block

But when I saw it in the context of this memory quilt, something just clicked. Debbie linked to the tutorial she used, written up by Little Miss Shabby.

P1060902.JPG

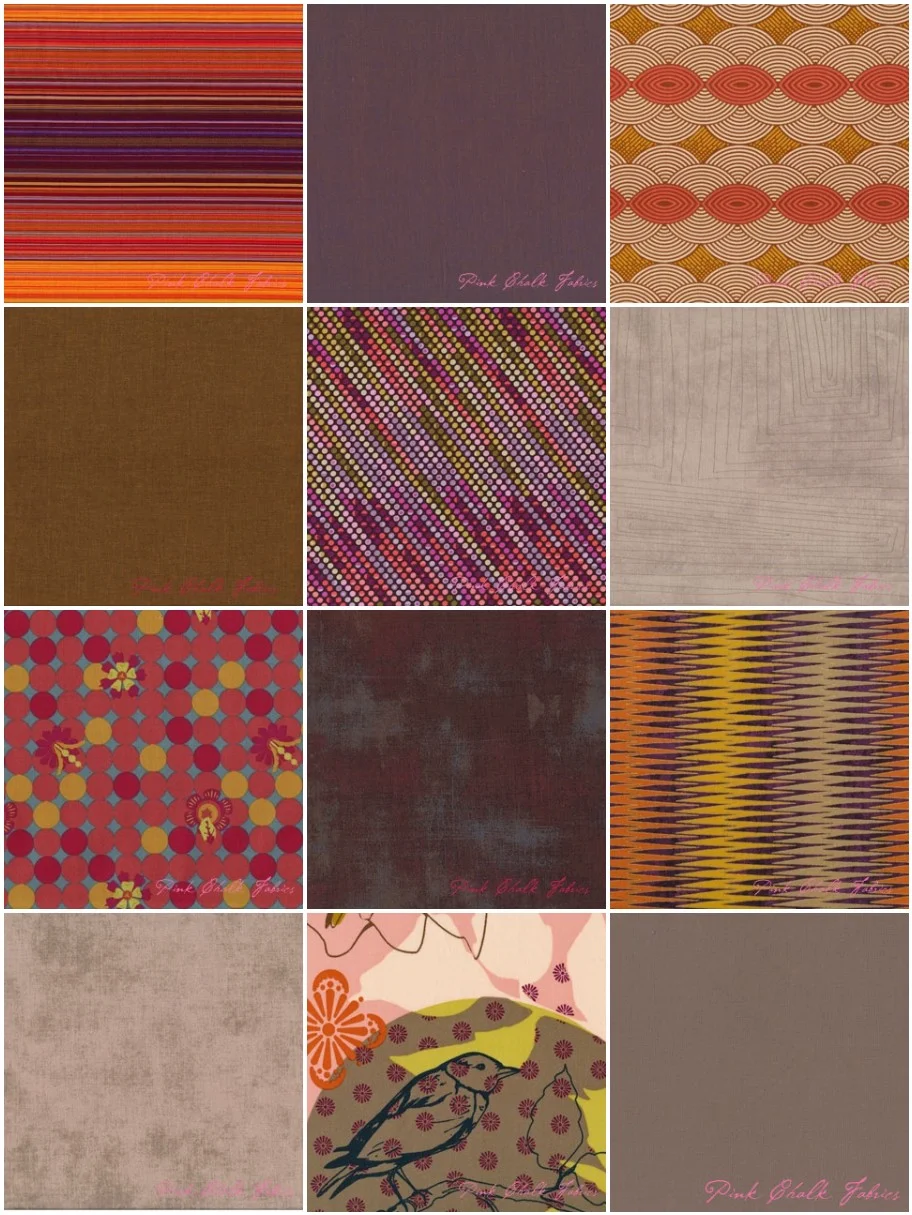
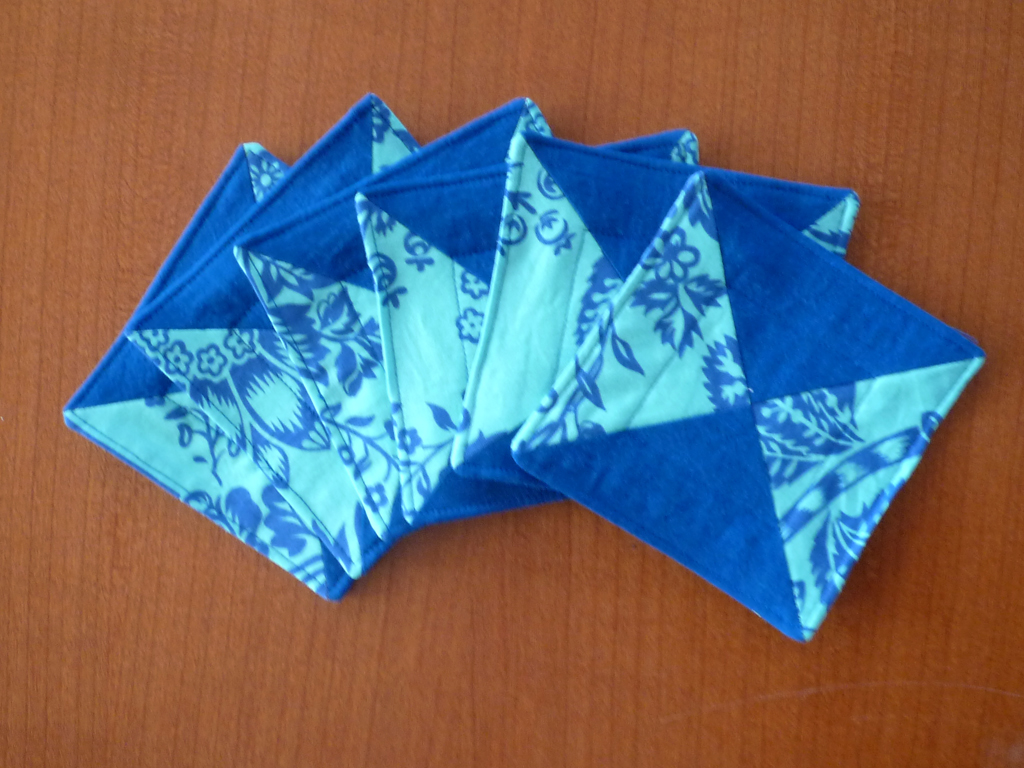
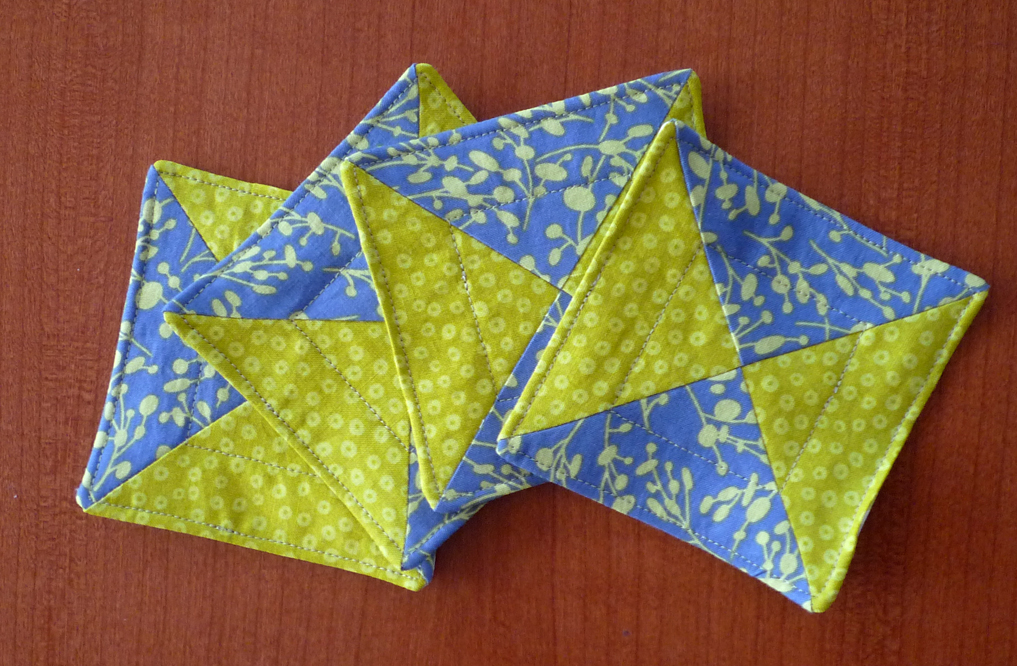
Can't you just picture a quilt with these great prints on the blocks?? And those accent strips are perfect for the ties! 

P1060901.JPG

This is a new venture for me, but one I am glad to be able to take. However, I will admit, taking the first cut will be the hardest. 

Give it some thought first

Over the weekend I managed to quilt a do. Good Stitches quilt that's been hanging around for a few months too long. It felt good to finish the quilting, let me tell you! 

And then it was time to choose the binding. 

I made a mistake that I may have made in the past, but has never seemed quite so glaringly obvious and yet so easy to pass over at the same time. I chose the binding fabric solely to match the backing fabric. 

P1060816.JPG

They look great together, don't they? Well, even before I cut the strips, pieced them all together, pressed and sewed it down to the quilt, I auditioned several fabrics. And I THOUGHT this one worked. I mean, it does work, but, well... let's just say it acts as more of a frame than this quilt might need. 

P1060818.JPG
P1060815.JPG

I am going to withhold final judgement until I finish and can get a good look at the whole thing, deeming it way too late to make any changes at all! I actually like the color with all of the pieced blocks and even with the setting triangles, I just hadn't accounted for the bold contrast reading like the wallpaper I had in my bedroom when I was 4 years old.

And that's the story in a nutshell. 

Mosaics for a new season

Browsing through Flickr late on Wednesday I noticed some beautiful, simple and serene photo mosaics put together by Rachel {Stitched in Color}.  I think what really caught my eye is that one of the photos she included is pinned to a Pinterest board I have on color inspiration, and helped inform the palette for my Friends + Fabric 2 Bee quilt earlier this year.

Blocks from all 11 members of the bee... which I still sadly have yet to add to in order to finish the top.

Blocks from all 11 members of the bee... which I still sadly have yet to add to in order to finish the top.

The mosaics were given a poetic title, Washed Earth, and as she usually does, Rachel had put a link to a blog post under each of the photo mosaics in her photostream. Even though the work day was coming to a close and it was almost time to close up shop I followed the link. Her post, found here, was introducing a new challenge hosted by Pink Chalk Fabrics.

The challenge is a fabric mosaic challenge, bringing together 12 fabric thumbnails from the Pink Chalk Fabric website to express one's interpretation of the phrase Washed Earth. Now, THIS is a challenge I can have fun with! Combining colors and prints for an overall feeling... one of the few things I feel I truly excel at. There are prizes involved, including a fat quarter bundle of their selected fabrics for the winning mosaic-makers, and really it's just a fun distraction to welcome the sights and smells of autumn rolling in (at least in this part of the US). There is a link on Rachel's blog post which will be open through October 3rd, and each participant is welcome to add up to 2 mosaics.

So a full day or so after I saw the blog post, I came home, poured myself a glass of wine and hunkered down on the sofa with 3 tabs open on my computer browser and started to play. One tab was dedicated to the Bighugelabs Mosaic Maker, one to Pink Chalk Fabric's site, and another to Pinterest, just because. I was toggling back and forth, cutting and pasting image links, previewing what was developing in my mosaic, moving things around and taking them out completely... until I had ended up with 3 different mosaics!

Mosaic #1

Mosaic #1

Living here in Oregon, the washed earth still contains plenty of green, but those richer browns and reds come out too. In a way this is still my favorite of the three attempts, but also may not be among the ones I submit, since there is something just a little disjointed about it. It might be the intensity of the two Jane Dixon prints in the center, the pebbling patterns. I love them and think they speak volumes, but those volumes might be a bit strong for this. So, on to the next one - swinging very much in the opposite direction!

Mosaic #2

Mosaic #2

Now, some of those yellows and greys had shown up in the first mosaic, and I realized when I first viewed it with the images that I really had two completely different color stories going, so I made a simple text document with each of the image URLs copied onto it, dividing the stories into two separate lists. This one says a little more to me about the contrast of less saturated colors in the dimming light and the deepening of the golds as leaves and flowers and vegetables left on the vine too long turn away from their summer glory. 

Mosaic #3

Mosaic #3

But I think it took one more thorough browsing of the Pink Chalk Fabric site to find my rhythm and bring together a palette that is so very much my taste. I'm an autumn baby, with the autumn complexion and color tastes, and these dusky, earthy tones make my heart sing. Even though I will profess until my breath runs out that I do not like purple, the plum and burgundy hues have been creeping more and more into my artwork and my wardrobe. Just sayin'. 

So those of you with a fabric obsession who enjoy putting stacks together just for the sake of the exercise should visit Rachel's blog and get in on the fun. And for those of you who find inspiration in color and other people's interpretations on the same theme, there are some amazing mosaics already linked at the bottom of the post! One could spend hours just taking in the eye candy.

Finally a Finish! Kinda...

After months and months of gathering, piecing, playing, rearranging, absorbing, more piecing, etc., etc. I have a completed quilt top. 

Yes, I am so happy with the results! And yes, I am also happy that this photo is the LAST TIME this quilt will be up on the design wall EVER! So happy!! 

I stopped marking the journey, because well, it was slow-going. I had all of the elements with which to work, it was just a matter of breaking them down into the right combinations and putting it back together. That took a LOT longer and more consideration than I had anticipated. For a style of quilt that I love, the process was at times very frustrating.

Going from the independent strips, combining into strip sets like this: 


over and over and over again... making piles like this:

P1060106a.jpg

and more strips... 

and so on and so forth. 

I think you all get the idea. This went on for weeks, then months, adding more triangles to the mix, but not piecing anything together until the bulk of the composition was established. And this whole time it stayed on the design wall. 

Which I knew would pay off. I eventually got confident enough with the core body to begin sewing my diagonal rows together, then started building along the 4 sides to ultimately reach queen size. I figured, once the top came edge to edge on my 8' square design wall, then I had reached my goal.

IMG_0447a.jpg

I'm not yet sure how this will be quilted, but I know it won't be by me!! Even if I had the capacity to quilt a 100" square quilt, it would take me another 5 months to finish, and that would be a very dark cloud over me. So this is one of those situations where I admit my limitations and will call in some help. Another thing I know is that once it's quilted I will be trimming off the points on the sides. But I'll worry about that stage when we get there.

But for now I intend to fully enjoy having my design wall back in all its 8' glory!! 

Finding a Rhythm - and a Reason

Sometimes it can be difficult to stay on track. Who am I kidding? I haven't been on track for months now and my challenge is getting BACK on track. And what better way than to dangle a carrot so I have something to reach for? 

Now, not to get ahead of myself I am fully aware that they haven't even begun looking at submissions for vendors. It is a juried process, and given the fact that I've never done one of their shows before it is a reach to think I may be accepted. HOWEVER, it is a wonderful goal toward which to work. And the worst that can happen is that I am not accepted and I have to find another venue for selling all of the items I've been working on to have inventory in stock. 

Like... more coasters: 

maybe some more pot holder sets, and if I'm REALLY on top of it I'll perfect those darned oven mitts! 

IMG_0394a.jpg

I was having a discussion with a couple of different friends recently about the efficacy of Etsy. It really is great to have as a passive option for selling one's wares, but I'm feeling it's well past time to find other more effective venues. So, fingers crossed I'll get into this holiday show — but if I don't it has at least gotten me thinking about more possibilities.

Do you all use some of these self-guiles to get things done, too?? 

Trying something new

For a while now I've had people ask me about making oven mitts along with the pot holders I enjoy. The truth of the matter is, I don't use an oven mitt (I find them uncomfortable) so it never seemed a priority for me. But lately I've been thinking about how to expand the appeal of some of my sellable items. 

So a couple of weeks ago I began the process by making 2 rectangles of quilted fabric, using muslin as the backing, and my usual combo of one layer of Insul-Bright batting and one layer of Warm & Natural 100% cotton batting.  For this first test run I also decided to use a fun fabric that's been sitting in my stash for years...

And then yesterday I finally got around to tracing an oven mitt I happen to have (which might never have been used as far as I know) using a micron pen on the muslin side of the quilted sandwiches. Mirror images on each side. And pure luck would have it, once I actually cut them out they just about matched! 

P1060701a.jpg

The next few steps went quite smoothly.  I learned while playing with a different kind of prototype a couple of months ago that when putting a binding on a narrow circular edge one should do that BEFORE closing up the seam. So, on went the binding to each of the sides of the mitt and then I sewed approximately 1/4" to 3/8" from the edge all around the rest of it.

P1060700a.jpg
P1060702a.jpg

It seems I made the thumb a little short and high up, so that will need adjusting. 

And as I was turning the whole thing right-side-out I realized I should have been using a poly thread for the outer seam, as I heard little pops of snapping stitches here and there in the process. Ooops. And then there's where the fabric on the underside didn't quite make it into the seam... 

P1060709a.jpg

Oh, and remember that cool loop I made with the binding? 

P1060705a.jpg

Did any of you all see that coming? Obviously I did not. I never was good with figuring out the engineering of a 3-D object — the same thing happens when I try to attach straps in a lined bag. My first attempt always has them inside the wrong layer! 

So as I've mentioned, this is just a trial run, but one that I think did its purpose. I got a pretty decent prototype made, and it revealed some of the problems I need to fix. It will just make it easier to try another one soon! And let me tell you, I have PLENTY of Halloweeny fabric to play with!!

A little wish list

Well, I have not gotten much more sewing done in the last week since I wrote that last post, but as I sit at work in the nearly 90°F afternoon and just flipped on the A/C window unit I keep ogling the fabric shelves. 

I've been really good about not buying fabric lately, primarily because I haven't been doing ANY sewing, so it's hard to justify that I'll actually use any of it. But a girl can dream, right?? So I've put together a few combinations of fabrics both new and not-so-new that have been tempting and teasing me for anywhere from a week to 6 months or more. And I may have inadvertently found a combination of 3 that go together SO WELL I just have to get them! 

Welcome to the tip of the iceberg. 

image.jpg

L-R: "Down Under" by Mint Blossom for Northcott; "Tree Rings" by Martha Nagley for Rowan (and let me just say I fall in love with every color way of this print I see!); "Volumes - Hand Drawn Garden" by Anna Maria Horner for Free Spirit; "Nordika" by Jeni Baker for Art Gallery Fabrics.

This grouping maybe not so well coordinated, but I love them all for different reasons. And I have NO idea what I would use any of them for! 

image.jpg

L-R / top to bottom: "Briar Rose" by Heather Ross for Windham; "E-I-E-I-O" by Jack and Lulu for Dear Stella; "Winter's Lane" by Kate & Birdie Paper Co for Moda; "Belle - Coriander" by Amy Butler for Rowan; "Uno" by Stof; "Go Fish" by Hoodie's for Timeless Treasures.

After spending the last 2 days working on this, I don't think this post was ever meant to make it to publication. I learned that though it is possible to write a new post from my iPad, it is not easy to do. This is what I get for letting the blogging skills wane for so long!

Okay one last photo of goodies that may become my first actual purchases from this list (or at least a couple of them): 

image.jpg

L-R / top to bottom: "Jungle Jive" by Maria Kalinowski for Kanvas; "A Ghastlie Web" from Alexander Henry Fabrics; "Broome St. Floral" from Alexander Henry Fabrics; "Cosmos" by Laura Gunn for Michael Miller; "Lush Uptown" reprint by Erin Michael for Moda; "Modern Meadow Herringbone" by Joel Dewberry for Free Spirit; "Poppy Modern" by Jane Dixon for Andover. 

I hope that you all have found some sort of inspiration in my jumbled up head and are more successful at using the creative energy for working in your sewing rooms than I have been lately. Soon enough, soon enough... 

Back in business

As some of you may have noticed, I've kind of taken a hiatus on the blogging front this summer. Between travels, summer activities, change of schedule and having been focused on just a couple of long-term projects, I suppose the updates (and desire to share) fell to the wayside. 

But I'm back. Slowly but surely. 

For one, during my awesome travels I took an old trusty friend along: 

This may be a completely foreign object to some of you youngsters, but this is a medium format camera gifted me by a friend and former classmate nearly 10 years ago.

This may be a completely foreign object to some of you youngsters, but this is a medium format camera gifted me by a friend and former classmate nearly 10 years ago.

The film I shot on the trip was just dropped off yesterday for processing. Yes, Portland still has a few places where one can process not just film, but MEDIUM FORMAT film. What a relief. 

Now, of course I also had my little snappy digital camera along, as well as my iPad which served as an alternate camera at times. But it's the film photos I am most curious to see. It had been a LONG time since I've shot film and gotten it developed. In the efforts of keeping this a dedicated quilting and craft blog I'm avoiding dumping the Alaska and Vancouver photos here, but if you are at all interested, please let me know in a comment and I'll be happy to share in a future post!

And speaking of LONG time... yesterday I sat down at the sewing machine I have at home to work on some make-up bee blocks. I had cut out all of the initial units when I was in the studio last Monday in order to bring them home and work on them on days/evenings I couldn't get to the studio. The block consists of many half-square triangle units and is super effective! My bee-mate Amy designed the block and has a great tutorial up on her blog, 13spools: http://www.13spools.com/2013/06/flock-of-half-square-triangles-block.html. Anyhow, I took out the thread and bobbin that were in the machine, put in lighter thread, wound a new bobbin and set the whole thing up. Then I started chain-piecing... and chain-piecing... until I got to the end of the 15 square chain. Then I went to cut the thread and flip them over to stitch the other side:

P1060685.JPG

and something didn't seem right. They pulled and started gathering strangely... and then I looked closely on the bobbin side of things. 

What's up with that??? Now, either the bobbin case wasn't properly seated, or the top thread wasn't properly threaded through the machine, but either way it was an easy fix. Too bad it only showed on the BOTTOM of things so I didn't notice while zipping away at the squares and wasted all that thread (not to mention time).

Is this what's called "getting rusty"?  Guess it's time to scrape of the road dust and get back to business.