A 2014 finish

I can't promise that this will be my last post about this behemoth, but it is my attempt to tie it all together.

DSC_0185a.jpg

I finally sent this off to NYC earlier today. Phew! Even those of you who may have been keeping abreast of the journey probably don't remember when I first started working on this. I'd say I started the design process some time in March of last year (2013), the first mention of it, veiled as it was, was in this post from last April. And though I got it back from the quilter in late November, the finishing details got dragged out for another month plus so I can't claim the finish until this new year. And let me tell you, this is FAR from being the most dragged out project. Just one of the more dragged out that I actually was working on consistently throughout the whole period of time.

But what a project to sit atop the list for 2014!! I do have to say I'm rather proud of it. The inspiration for the overall design was a combination of two different quilts I've done in the past:

Made in 2011 in response to a design challenge presented by The Modern Quilt Guild

Made in 2011 in response to a design challenge presented by The Modern Quilt Guild

Made in 2009 or 2010. One of my all-time favorites, which now belongs to my almost sorta-mother-in-law-in-law.

Made in 2009 or 2010. One of my all-time favorites, which now belongs to my almost sorta-mother-in-law-in-law.

The request was to design something close to the monochromatic color wash but with deeper pockets of jewel tones. At least that's how I remember it and how I ended up interpreting the final design. I've gone into much detail about my design and process while constructing this quilt, so I won't repeat myself too much, but if you're interested in checking some of the older posts you can find them at these links: 5/12/13, 6/4/13, and 9/16/13.

That September post shows the finished quilt top before it was left with the oh-so-talented local long arm quilter Nancy Stovall, Just Quilting PDX. And let me tell you, she did a phenomenal job! I am not sure how we managed to choose the ONLY quilting design I could imagine working as well as this one does. I went into her studio with next to no idea how the quilt should be quilted, we bounced a couple of ideas off of one another, looked at some of the designs on her computer and somehow worked out this beautiful, large-scale wave.

DSC_0168a.jpg
P1070223a.jpg

Something about those gentle undulating waves manages to encompass the fluidity of the color wash while leaving the geometric elements intact and without tensions. That says quilting success to me!

P1070223a.jpg

My friend Cherie was generous enough to allow me to use her washer and dryer for this 104" square quilt, and on top of that, she and her MIL held it over the stairwell banister so I could get my first full photo of it outside of the sterile environment of my studio. Too bad I didn't really know how to use the fancy digital camera I borrowed from J. Please excuse the poor out-of-focus photos!

DSC_0132a.jpg
AND I got to see it spread on a bed... my house can't provide a big enough bed in a big enough room to test this one out. 

AND I got to see it spread on a bed... my house can't provide a big enough bed in a big enough room to test this one out. 

One thing I have not yet addressed is the special binding on the quilt. You may have noticed that the inspiration quilt for this has serrated edges due to the diamond construction, and this quilt top also had serrated edges that ultimately got trimmed after it was quilted. However the perfectionist in me who hides deep in my unconscious reared up and instructed me to match the color/value of the binding all the way around the perimeter. Yikes.

DSC_0196a.jpg

And just a few more photos of me hanging the final product in the studio so that J could take some proper portfolio photos...

DSC_0144a.jpg
I guess I can no longer claim to have a pet-free studio... it's a small sacrifice to make, let me tell you!

I guess I can no longer claim to have a pet-free studio... it's a small sacrifice to make, let me tell you!

DSC_0232a.jpg

And the final touch:

DSC_0164a.jpg

A WIP Wed. post - Oh my!

Well, it's only been about, oh I don't know, 8 months or so since I last did a WIP Wed post. I'm excited to be back to it! Now, this is no promise that I'll continue in a consistent manner... who knows what next week will bring!

I've actually been doing some sewing and sewing-related activities this last week. Here's a look:

Memory quilt #3

The 3rd of 3 memory quilt tops

The 3rd of 3 memory quilt tops

After a too-long hiatus (which to be fair was probably only about 3 weeks) I returned to the memory quilts and got the blocks for the last of the quilt tops put together. It has now been pin basted and is ready for quilting (the other two have yet to reach that step, but I'm happy to have the ball rolling again). And here's what all 3 of the pieces look like pre-quilting:

P1070286a.jpg

These will ultimately be going to each of my late uncle's kids after making a stop with my aunt. They are made using his shirts and ties and I was inspired by this tutorial by Little Miss Shabby, previously blogged about here and here.

do. Good Stitches blocks for January

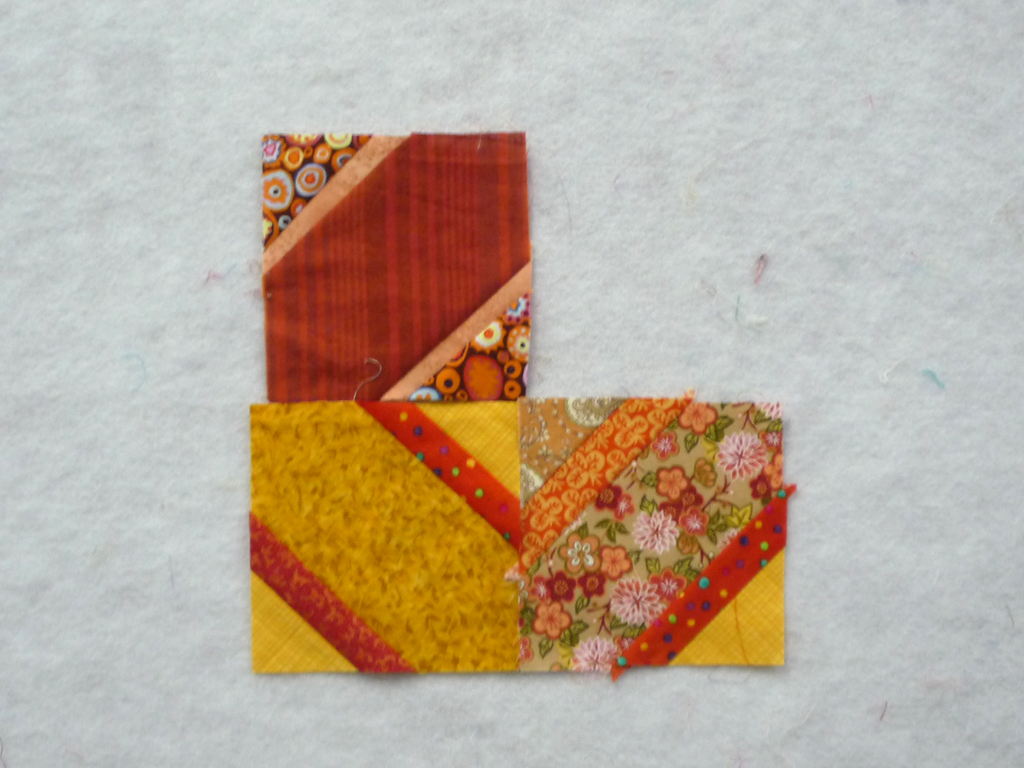
For The Bliss Circle of do. Good Stitches - using Ashley's tutorial for her Converging Corners block

For The Bliss Circle of do. Good Stitches - using Ashley's tutorial for her Converging Corners block

And did I say something about getting Patterns going??

P1070280.JPG
P1070281.JPG

There are still edits and tweaks to be done before it's ready to release, but I have to admit it feels good to finally be getting somewhere with this!

And my one big finish... which lingered and lingered, but the finish actually came this past week — The Aqua Value Wash Quilt

The initial wash... with a whole box of Color Catchers thrown in!

The initial wash... with a whole box of Color Catchers thrown in!

I'll have to do a follow-up post with a photo of the quilt after being washed. I haven't taken any yet, but it will have to happen soon so I can send this thing off finally!

And I think that about sums it up. It's not an impressive list, but it's a list all the same!

New: 1

In Progress: 2

Finishes: 1 (plus bee blocks)

Thanks for stopping by! If you came here from Lee's blog Freshly Pieced, thanks, and if you haven't yet been over there for the WIP Wed. post, do check it out!

Starting a new year

Now seems to be the time that many a quilter blogger is cataloging his or her past year's accomplishments. I am not going to do that this year. For one, I feel that my roster of projects is much slimmer than I would have liked, especially for the last quarter of 2013. But mostly because I don't feel like looking BACK at this point.

My momentum wavered and to get it back in gear I think it's best that I simply look FORWARD.

An assortment of fabrics from Art Gallery

An assortment of fabrics from Art Gallery

There's going to be something fun and exciting happening with that little stack up there! And maybe a little outside of the box for me. Or perhaps it's what my last 7 years have been leading up to - we'll see. For now all I can say is that I am looking forward to a new adventure partnered with a talented friend, Pieced by Cherie. I think we'll keep each other motivated and in check and heading in the same direction. And so far we seem to be having fun in the process!

This is still a work in progress and may be discarded entirely, but I've been working with my brother-in-law-to-be to redesign my logo. It's difficult to do from over 3000 miles apart, but we'll figure something out soon!

This may look slightly familiar to anyone who's been following me for a little while... New color way for Lock 'n' Bolt.

This may look slightly familiar to anyone who's been following me for a little while... New color way for Lock 'n' Bolt.

And I know I've been saying it for a couple of years now, but there WILL be patterns rolling out this year. They might have to be analog-only unless I can find someone with technical savvy to show me how to deal with PDF uploads and such, but I prefer the physical paper stuff anyhow. I've set myself more than just a goal, but an actual commitment! 

So, there's a small taste of what's ahead. And I just have to share a pic or two of what has REALLY been occupying my energies over the last month or so, which may explain why very little sewing has been happening:

Meet the sweet Atlas!

Meet the sweet Atlas!

IMG_0058a.jpg

Fine Craftsmanship

This phrase can apply to just about any endeavor (done impeccably, that is). Being a fine craftsman isn't necessarily limited to the scope of making "crafts". It's about how one makes anything... a meal, a painting, an essay, an electronic gadget or even a piece of software. 

And when one is looking for a product, it always pays off to wait until finding the piece that is crafted well. In this particular case I AM talking about something that falls into the traditional definition of "craft." For a couple of years now I've been keeping my eye open for a nice quilt rack to display quilts at my home or studio, instead of keeping them folded up in the basement or layered unseen on the guest bed. I would pop my head into antique shops on the rare occasions I found myself near any, troll on Etsy and even see what I might find in more mundane home goods stores. But nothing I found seemed to fit both my ideal aesthetic AND quality makemanship (sure that's a word, right?). And for those of you who don't know me so well, by "ideal aesthetic" I really mean anything in between (but not including) country primitive and futuristic minimalist. My house is west coast craftsman style, and the things in it are a hodge-podge of furnishings gathered over many years and by various members of my family, so you can see I am really not striving for magazine-ready design.

As luck would have it this year's International Quilt Market and Festival in Houston fell right around my birthday and my mom invited me to join her for a birthday celebration weekend. How could a girl resist?? Mom time AND quilts?? Also, being aware of my ongoing search for a worthy quilt rack/ladder, my mom suggested we might see some at the vendors' mall at the show. Well, we sure did see some. Not many, but some. Mostly antiques, which though beautiful (in some cases), were not sturdy enough for my needs. And then there was Booth #1629 - DWR Custom Woodworking. I kind of wish I had taken a picture of his booth right now, but honestly it wasn't all dressed up or anything — just packed with samples of his work in the forms of quilt racks, wall-mounts and quilt ladders. Simple and striking and beautifully constructed from what we could tell. Enough to make me want to swing back the following day and commit.

The 4-run Apple Ladder

The 4-run Apple Ladder

About a day or two before Christmas, among their mad dash with holiday gifts, A Fed-Ex truck stopped in front of my house and deposited a 6 or 7 foot by 6" square package. MY QUILT LADDER! And it is everything I had hoped:

Beautiful finish that blends perfectly with my floor and other wood furniture.

Attention to details, making sure the various elements fit together just so.

And it all adds up to a piece that I will be proud to display in my home, and have actually made room for in my little house, assuming our new dog doesn't mess around with the quilts too much (he's more interested with the quilts actually on the couch, though I haven't given him too much opportunity to play with this set-up).

I consider myself pretty conservative with my product endorsements, but I will gladly recommend this craftsman, David W. Reiner in New Britain, PA, to anyone in search of a handmade wood displays for quilts and other fiber arts! This truly embodies Fine Craftsmanship in my book!

Happy 2013 to all!!

Taking Some Time Off

I am sure that those of you who have been reading my blog off and on are aware that I have taken part in multiple virtual quilting bees over the last couple of years. I've not only taken part in, but have had an amazing experience, learned many new techniques, tried things I wouldn't otherwise try, and most importantly have met some absolutely wonderful individuals in the process!! I'd go so far as to say I've made some friends over the years (though haven't had the pleasure of meeting them all face to face yet)!

That said, I've made the decision to go into 2014 with less on my plate. Actually, that's inaccurate... I have new things on my plate that take precedence, and have made the somewhat difficult decision to take the year off from bees, with the exception of the do.Good Stitches Bee. I love the creativity that goes into them, the community that builds around them, and of course sharing our handiwork among friends. But I fear that I won't be able to be as diligent as I'd like to stay on top of the schedules.

So, I guess you could say that today I made my final bee blocks for a friend. Jenn wrote up a tutorial on her blog SunnyInCal for these Wonky Braid Blocks. These were made using a paper foundation method, and though I struggled initially, once I got to the point of removing the paper it all fell into place.

And here's the brutal truth... out of something like 6 virtual bees I've been a part of in the last 2 to 3 years, I have finished ONE quilt. Granted, I have one other almost completely quilted and another ready to be quilted, but the others are in various stages of incompleteness. And I feel bad about that. So maybe it's time to take a breather. Maybe this will allow me to use some of the time finishing these UFOs instead of taking on more unfamiliar techniques. At least that's the plan. And if other projects fill in the void, I'll let y'all know!

International Quilt Festival, pt.1

In contrast to many other posts y'all may see born of this quilt show, this particular post is going to be short and lacking in photographs. The photos will follow soon once I get a chance to go through them and make sure I have all of the credits in order. 

But I will say that this was the first time I've been to this amazingly huge show. My mom has been attending off and on for many years and FINALLY convinced me to join her (the fact that it fell just days after my _0th birthday and so was coupled with a birthday mother/daughter getaway had a large influence, too). And I'm so glad it worked out! 

The whole experience was overwhelming. There is no question that one needs to ration one's time and spread it out over the entire long weekend in order to really absorb any of it. And the quilts on display definitely ran the gamut. Many absolutely stunning pieces of art, a few rather mundane works, and several mixed in that made me wonder how they ever got juried into such a prestigious show. A little for everyone, you could say.

And then there are the vendors. Vendors and vendors and vendors. That deserves a post all its own. Did I say overwhelming? 

Well, I took dozens of photos of some of the pieces that stood out to me the most, and look forward to sharing with you all some of the highlights in my opinion. Next post coming soon...

Making the Cut

I had said that I would share a little insight into how I approached making quilt blocks from the shirts and ties my aunt sent me last week. I still have a long way to go, but here's a peek at the beginning:

Starting with stacks of shirts and ties, just like this... 

P1060898.JPG

I decided to start small and work from sleeves to begin with.

P1060917.JPG

Using my shears I snipped through the hem near the inside seam (on the long sleeved button-up shirts I simply used my rotary cutter and sliced off the cuffs entirely) and then ripped up to the armhole seam. You can see how nice and on grain that is below.

P1060918a.jpg

From the natural stop at the armhole seam snip on the perpendicular and slowly rip again. The tear should carry you across the sleeve leaving you with a rectangle attached just by the original inside seam where you began (and will need to snip through with shears), and the curved part of the sleeve still attached to the rest of the shirt.

P1060920a.jpg
P1060921.JPG

Luckily for me the short sleeves allowed just enough fabric to get the 5" squares after trimming off the finished hem with my rotary tools. I pressed out the piece of fabric I now had to work with, and treated it like any other fabric yardage, cutting into the base units I would need for my blocks. 

P1060922.JPG

Now, on these short sleeved shirts I only got a few blocks to begin with, but I still have the whole breadth of the body of the shirt to work from as I need to make more blocks! And that one is a little easier to suss out cutting, dontcha think? 

Once I had a few of these cut down into 5" and 2.5" squares I realized that I didn't need to cut the smaller squares separately for what I was doing. Once I cut the 5" squares to the desired shape I would have the corner pieces to work with. 

P1060909a.jpg

So the next step was to start cutting the ties. But before I could do that I needed to disassemble them, which is a much more time-consuming process than one might think. I spent quite a bit of time with a seam ripper at the stitches closing the backs of the ties (and have only done about half a dozen so far) and then removing the stabilizing inserts. But once I had a few done I got started on cutting those little guys too. 

P1060923.JPG
P1060911a.jpg
P1060912a.jpg

Mixing up the little corner units I started in on stitching them down to the bits from the ties which will ultimately make up the accent strips in the blocks. I centered 2 triangles on the silky smooth rectangles, stitched down 1/4" from the edges and pressed. Then I squared up and sliced evenly down the center of the rectangles, leaving me with 2 corner units. 

P1060914a.jpg
P1060915a.jpg
P1060916a.jpg

Now the trick for me is to step away from the sewing machine for a bit. Now that I have at least worked out the process and dimensions confidently I can go ahead and really make a dent in the piles of fabric (still all sewn into things called shirts!) and get a good chunk of squares cut. The more options I have, the better the mixing and matching will be when I am ready to sew the units into blocks. 

Oh, and a little side note... have any of you all tried quilting with ties before? I was not prepared for the challenges that working with slick nylon or polyester or silk ALL CUT ON THE BIAS would bring. Any tips or anecdotal experiences? Please share! 

Adapting

Sometimes adapting someone else's pattern or tutorial to get exactly what you are looking for is a cinch.

Sometimes, not so much. 

As I mentioned in my previous post, I'm embarking on a project based on Little Miss Shabby's Hugs & Kisses block tutorial.  However, I needed to adjust the tutorial ever so slightly for 2 main reasons, both based in the fact that I am using clothes and ties for the blocks: her technique creates WAY too much waste if one has a finite amount of material to use; since I'm using ties for the accent strips, I can't cut full squares for that .75" strip just to throw out the rest.

So I did some test runs. 

P1060903a.jpg

Starting with that same 5" square for the main part of the block unit I tested combining the accent strip and corner triangles a little differently. Just guessing at appropriate dimensions, I cut a rectangle of what would become the accent strips. I think I started with a 2.5" x 5" rectangle. Then taking a 2.5" square for the corners, I cut it once on the diagonal and placed a triangle centered on each of the long sides of the rectangle, stitching each down 1/4" from the edge. Pressed them out and trimmed so that I had a square measuring about 3.5" (I think). 

P1060904a.jpg
P1060905.JPG

Instead of lining up the pieced square exactly with the raw edge of the base, I offset it by approximately 1/4" so that I could use both sides of that block equally. However, something in the "approximately" made for less-than-uniform outcomes. In 3 test blocks I did with stash fabrics, each containing 2 corner units, I think I had at least 3 different widths of accent strips show up.

P1060906a.jpg

But each of this little testers added up did exactly what they were intended to do – help me figure out a formula by which to cut and piece the blocks for the memory quilt. So I got bold and started cutting into the clothing my aunt sent me last week. And voila! The first 4 completed units! 

P1060925a.jpg

In a few days I'll try to publish a post that illustrates how I ended up making these guys and shows how I worked with the shirts and ties to make them usable yardage (not quite as adeptly as the inspiring Luke Haynes!), but for now I'll just say I think I found my groove. Which is good since I have lots more of these to do!