
7am 26 Jan, 2013. This is terribly unprofessional, but I have to begin this post by venting - I spent the last 26 hours (minus about 10 hours for sleep and dinner) working on this tutorial and post, and thanks to this less-than-user-friendly Squarespace format I deleted the whole darn thing in one fell swoop, thinking I was removing a photo from where I placed it. Of those 26 hours, I can confidently say that no fewer than 5 were spent at this computer working on the original post. Grrr. Hopefully I can do justice to my original detailed plan in a way that you all can follow and enjoy. Down to it!
Please at least glance through all of the instructions before starting on this. I have combined a couple of different techniques, so you may want to pick and choose your approach.
Things you will need to begin:
Freezer paper
An iron that offers adjustable settings
A good seam ripper
Small, sharp scissors (preferably with a blunt point)
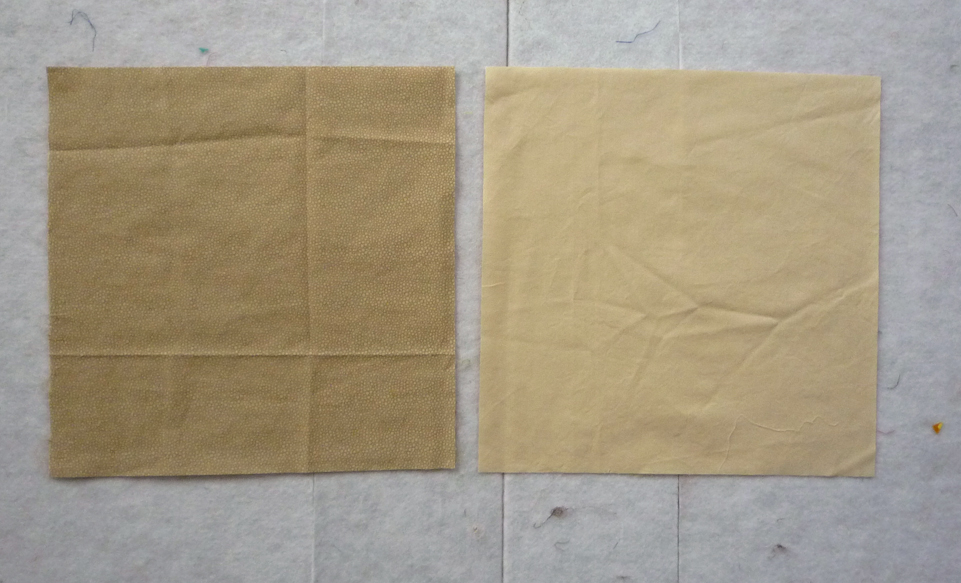
Fabric - background pieces of approximately 13" square and anywhere from 3-9 different prints for applique pieces per block.
*The following is optional and best applied if planning to hand applique as opposed to machine applique. I will include separate instructions for this technique in italics and marked with an asterisk (*).
*Heavy starch, a small container for the starch and a little, flat-tipped, inexpensive paintbrush.
1. Cut your background square at approx. 13". Chances are it will shrink up a bit with this technique, so this gives us some leeway on finished size.
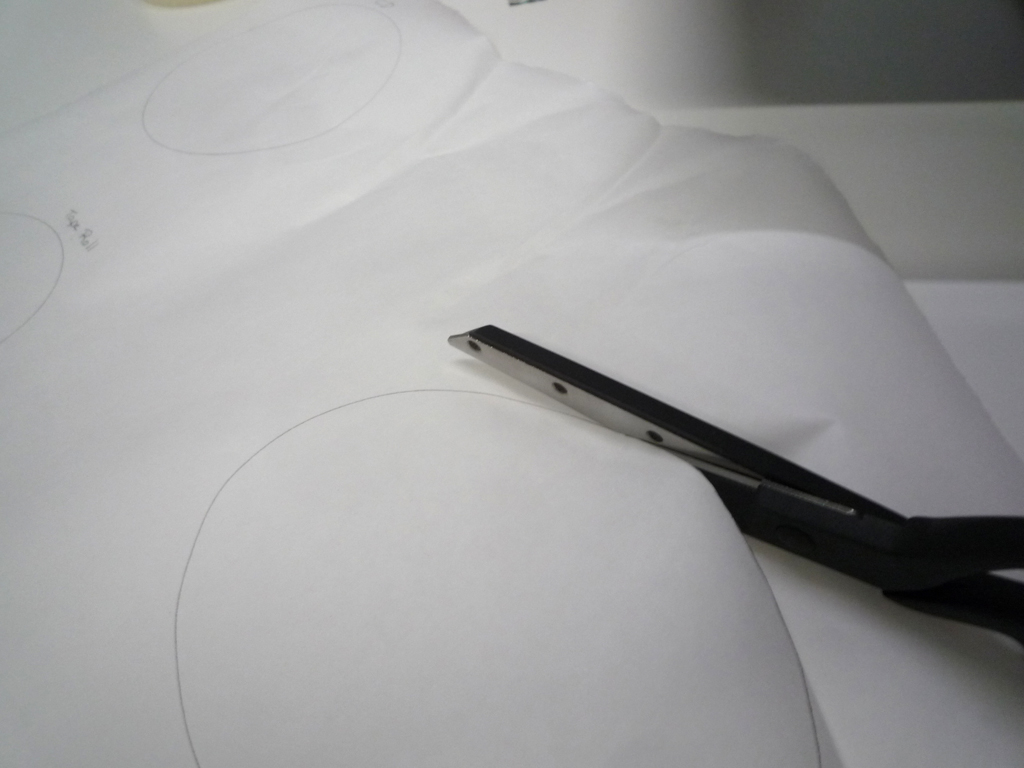
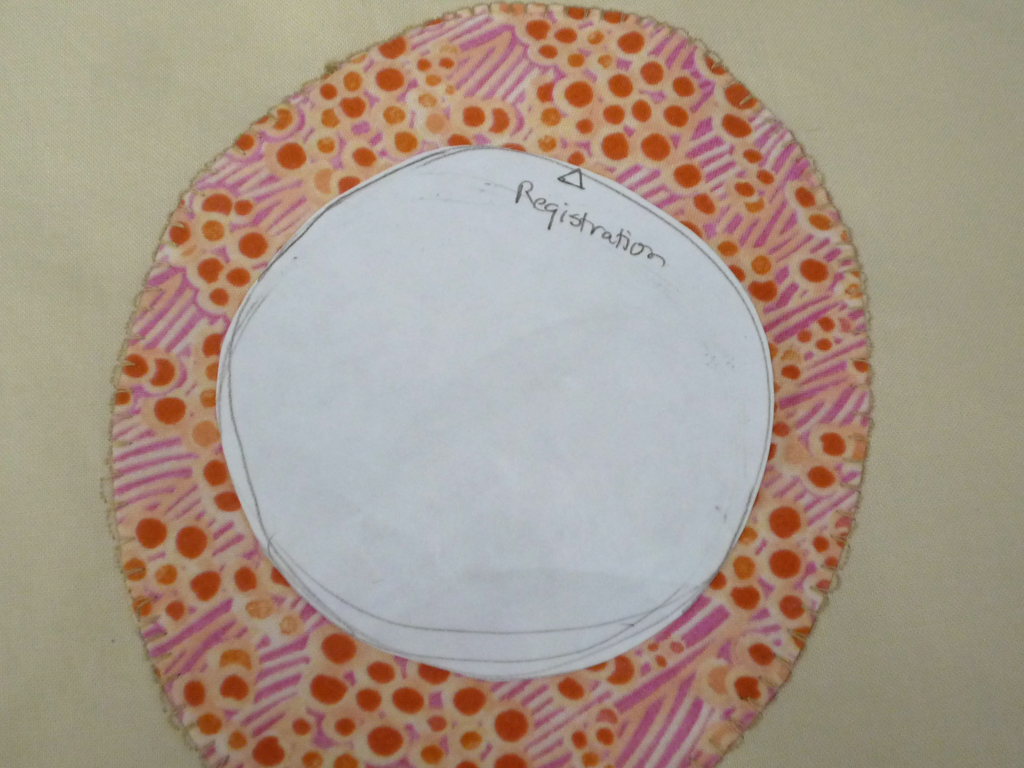
2. Draw your largest circle onto the non-waxy side of the freezer paper. Make sure it's no larger than 12" diameter (if you're planning to just do a single circle group on the block) or more likely somewhere closer to 7" - 4". To get your circles you can use any number of tools: a compass, an old CD, the lip of a glass or simply freehand it for a less precise look! Keep in mind that the finished applique piece will be the same size as your drawn line (give or take a millimeter or two).

3. Cut out your "template" ON the line.
*If you want to use the starch method, please skip to section 4b.
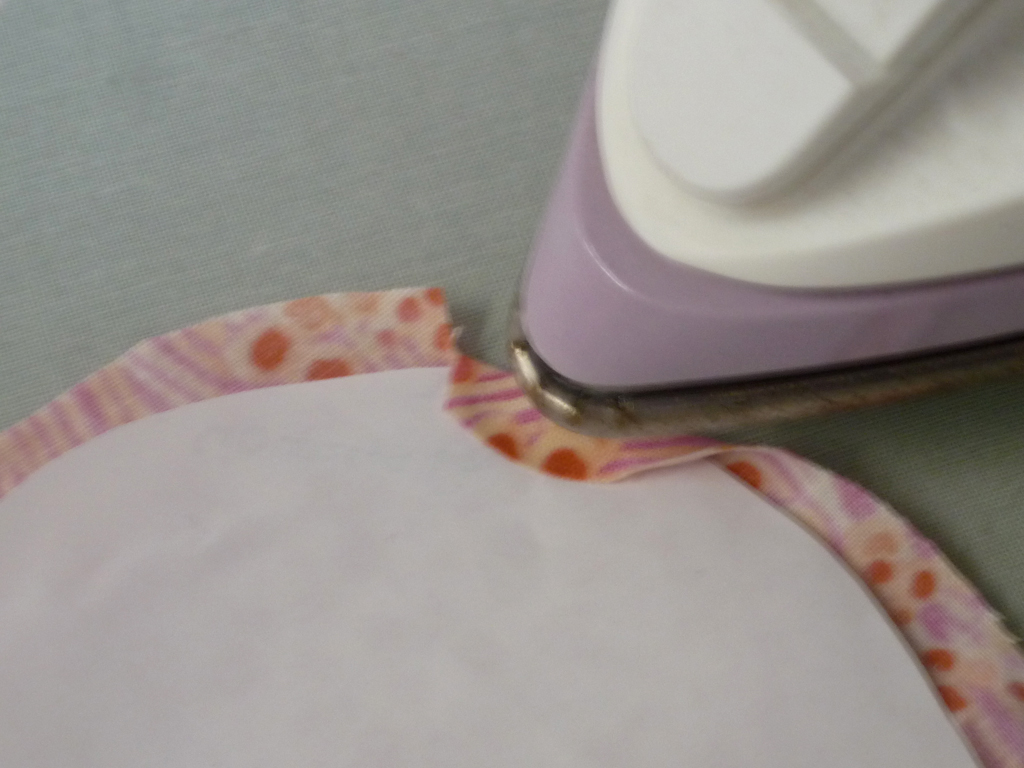
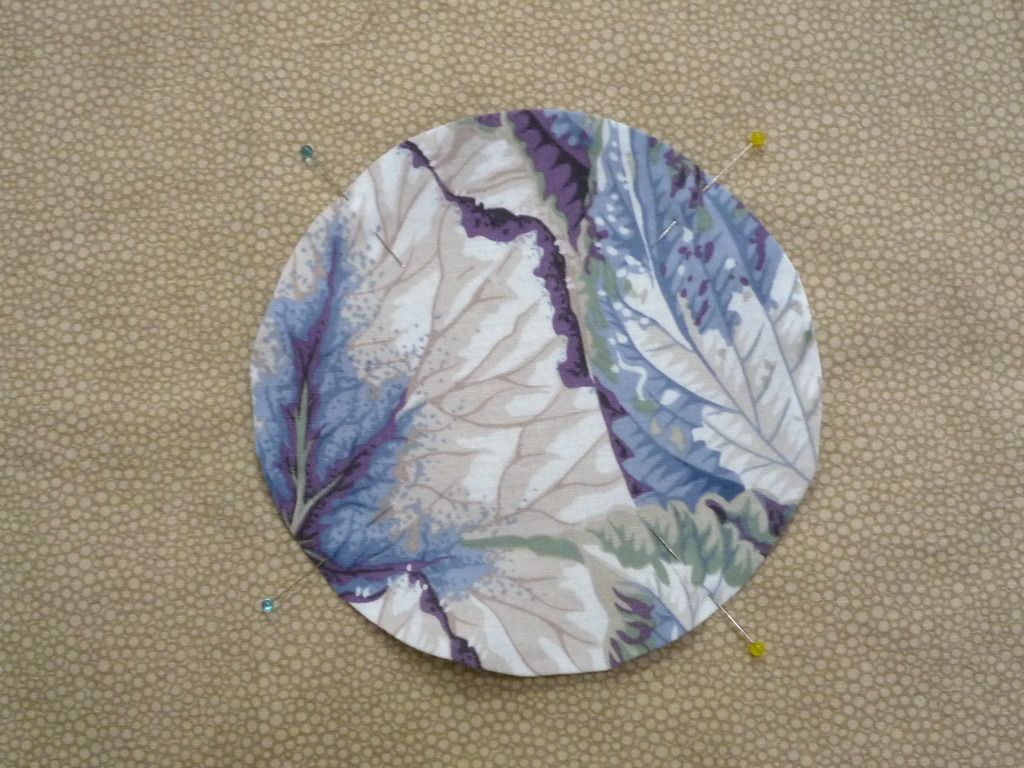
4a. Place your template waxy side down on the right side of your fabric for the bottom (largest) applique. Lightly tack it down using an iron on med heat - I usually have mine set at the Wool/Silk setting for this. Cut around the template leaving a 1/4" - 3/8" seam allowance to the outside of the freezer paper edges.


Now if you are using a freehand or wonky circular shape, make a registration mark on the template anywhere you want, then transfer it onto the fabric by making a little notch in the seam allowance.

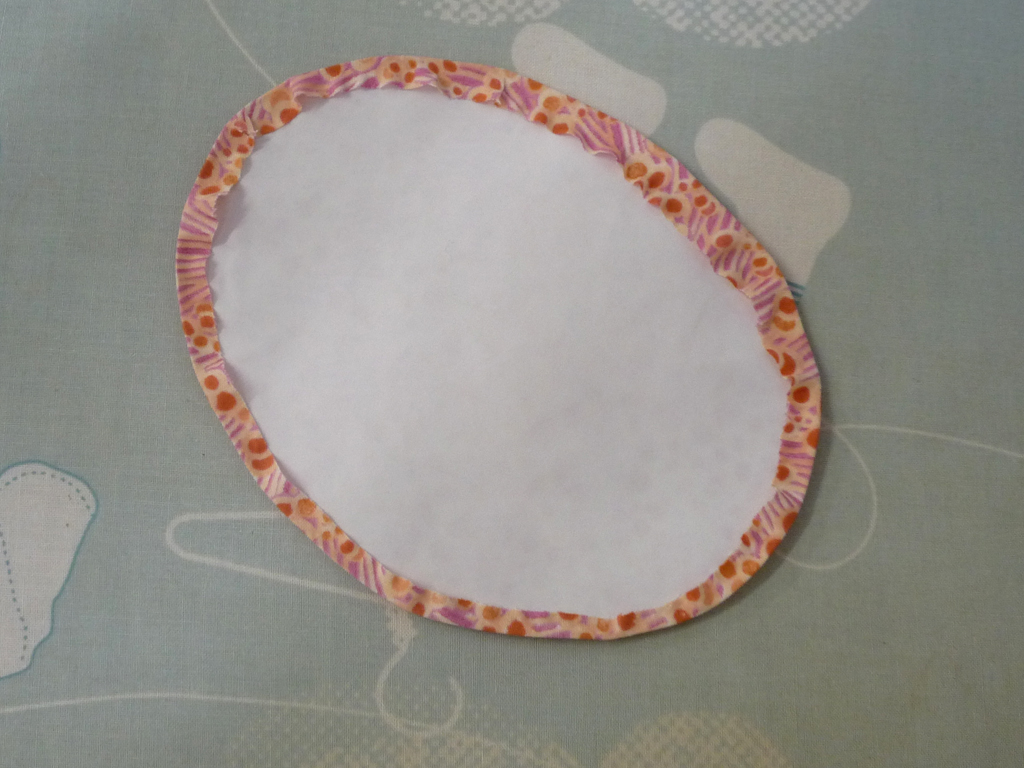
5a. Peel off the freezer paper template. Flip over your fabric piece so the wrong side is showing and place your freezer paper waxy side up, matching up those registration marks. Do the best you can to have at least a 1/4" seam allowance all the way around.

Start pressing your seam allowance onto the freezer paper, using the edge of the template for your fold. Be cautious not to iron directly onto the freezer paper itself, but if you do it's super easy to clean off your iron using either a sole plate cleanser or simply a damp towel or fabric scrap. You may need to ease some overlaps in the folds as you go around, or you can make more nips in the seam allowance and overlap the tabs as you go.
Please excuse the blurry photos that follow... my little camera and my left hand don't necessarily see eye to eye.


When you get all the way around leave the freezer paper in place.
*4b. For using the starch method (which as I mentioned is less ideal for machine stitching, but I gave it the ol' college try for the sake of this demonstration!) place your freezer paper template waxy side down on the wrong side of your applique fabric. Iron it on securely. Cut around the template leaving a 1/4" - 3/8" seam allowance to the outside of the freezer paper edges.

*5b. Put a SMALL amount of starch in a container that you can dip a small paintbrush into. Trust me, a little goes a long, long way!

Apply the starch around the seam allowance fabric, being sure to get right up to the edge of the template (it's okay to get some starch on the freezer paper, but you don't want to soak it so that the edge loses its integrity).

Press the seam allowance in toward the template. You may need to ease some overlaps in the folds as you go around. When you are confident that the starched fold will hold on its own remove the freezer paper.


6. Now for the fun stuff (yeah right...) - to apply the applique to the background! Again, if you already have a tried and true applique method, go for it! Choose what stitch you want to use. Feel free to go with either a straight stitch just inside the edge, a hem or blanket stitch over the edge, a zig-zag or some fancier stitch still - whatever floats your boat and makes you excited to work on this. I will say, please no satin stitch. Oh, and as the circles get smaller, maneuvering gets a little trickier, so keep that in mind. When you've decided on what stitch you're using, do a tester on a scrap so you can get your optimal settings.

The default settings for the hem stitch on my machine - one of my goto applique stitches.
Oh, and thread! Again, go with what makes you happy. I chose to take the easy road and use a neutral thread that more or less matches my background fabrics, but if you are feeling more adventurous you can try and match to each of the applique fabrics, or go with some wild contrast color. Have at it!

running a tester to get the right stitch length and to mark where the needle falls in relation to the presser foot.

The settings I landed on to begin (though I did ultimately bump the stitch length back up to .3)

7. If you still have the freezer paper in there (with the waxy side facing out) lightly tack it in place on the background block (I found this easiest working from the back with the iron applied directly to the back of the whole block). If you starched and removed the freezer paper, you will want to use a few pins to keep it flat and in place.

Start stitching!

You may come across sharp points along the edge from time to time, where the fabric folds are not softening to the curve. Simply use the sharp tip of your seam ripper to push those in and flatten them as much as possible.


* With one of the starched applique pieces this part is more or less the same, just beware of stretching the background fabric and/or the edges of the applique too much. If it does get a little wavy ironing it should help flatten it out.
pinned on in preparation for the stitching

shows a little stretching, but I was able to press that out.
*If you used the starch method, you can skip to step 10.
8. Now it's time to remove the freezer paper from between your fabrics. Working from the back of the block, take your seam ripper and pierce the background fabric just inside the bulk of the seams, keeping the point from going through the paper underneath. Tear a hole in the background fabric just big enough to get a blade of a small scissors in there. Your scissors should be sharp enough to cut fabric but ideally have blunt points so you don't risk going through the other layers of the fabric.


Cut all the way around leaving a seam allowance of approximately 1/4". Now you have a piece of fabric that can be used for another project or another block if you like!


9. To remove the freezer paper pull it away from the applique fabric in the same way you would open a bag of chips.

The stitching should serve as a perforation to help the paper tear away. Don't worry if there are little stubborn bits that won't come out, as long as there are no big chunks remaining it's all good! If you still have an intact circle or oval, hold onto the freezer paper template as you'll be able to reuse it in the next steps.


Press your block flat and get ready for round 2!


10. Adding the next layer. It's kind of like, "Second verse, same as the first!" only smaller.
For those of you who like to make the most use of every piece of fabric and paper, the template you removed from the first circle can be reused at least one or two more times. Simply flip it back to the papery side and draw another circle, smaller than the first. This will be an overlapping layer.

Repeat steps 3-9 using a fabric with a good contrast from the first.

As for how many circles you include on your blocks, that's totally up to you. Be creative and find a layout that appeals to you. For those of you making these as bee blocks for the F+F2 bee, I do ask that you try to do 2 or 3 layers at least once on the block.


But most important is to have fun and hopefully be inspired!
If anyone has any questions or concerns, please do not hesitate to contact me.